
How to use stayV Host · EP. 06
Using stayV HostCreate arrival instructions and choose when guests see them
At a glance
Create an arrival card that guides guests from the station to your entrance. Includes step-by-step examples and help choosing its audience.

If guests reach the neighbourhood but ask which alley to enter, the final few steps may be missing from your directions. Let’s create one arrival card and decide who can see it and when.
These real screenshots show a card and two steps entered and saved in the Seoul Ongi Hanok · Practice guide draft. The practice text is brief rather than a real route. Use the examples below to write directions for your own property.
At a glance
- Start with the part of the journey where guests most often get lost.
- Use a specific title such as “From Mangwon Station Exit 2 to the property.”
- Write one action per step in walking order, with photos of junctions.
- Choose Public, After booking or After check-in for each card.
- Keep door-lock codes in the dedicated access fields rather than cards.
Learn more
1. Open the property and select Arrival
Find the property in Property management, open its editor and select Arrival on the left. If you manage several properties, check the name at the top first.
You can start with one confusing section instead of describing the whole trip from the airport. “Station to property,” “Finding the entrance” and “Entering the car park” are manageable topics for both writers and readers.
2. Put the guest’s task in the title
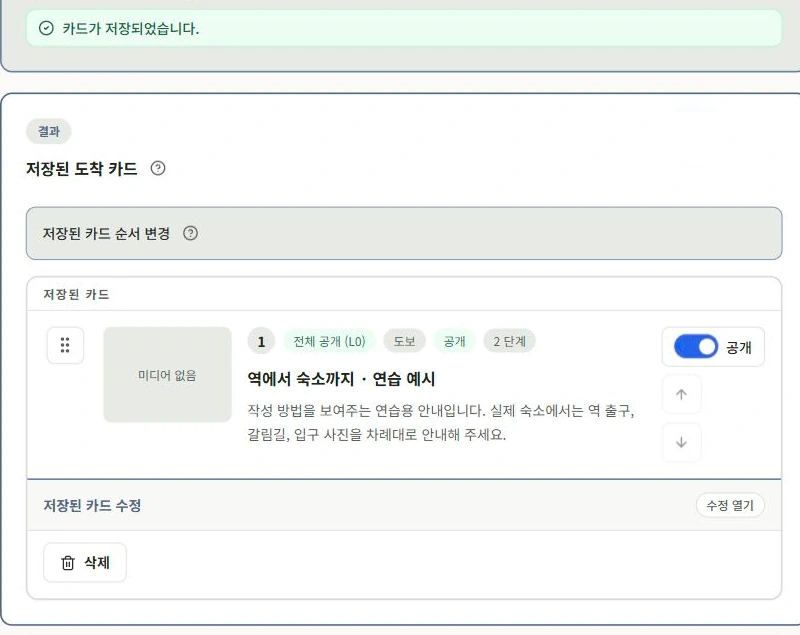
Open Add arrival card and choose a suitable type: Walking for directions on foot, or Car/Parking for guests driving.
The screenshot uses Walking and the title Station to property · Practice example. In your guide, a title such as “From Mangwon Station Exit 2 to the entrance” is more useful than “Information.” Guests scan titles while navigating an unfamiliar street.
Keep walking and parking instructions in separate cards. This also makes changes to routes or parking conditions easier later.
3. Follow the actual walking order
Imagine a guest checking their phone as they walk. Give one action per sentence and focus on places where they need to choose a direction.
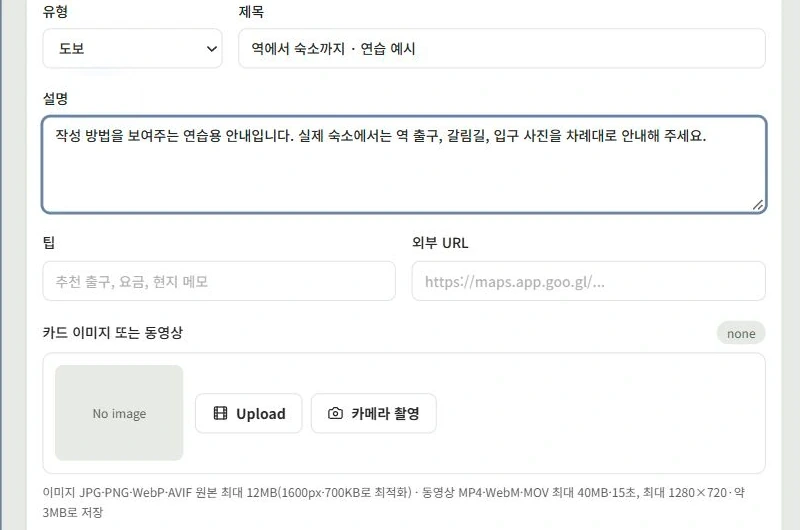
Summarise the route in the description, then expand Arrival steps to divide it into stages. For example:
Title: From Mangwon Station Exit 2 to the entrance
Description: It is about a seven-minute walk. Follow the main road and enter the alley when you see GS25.
Step 1 Leave Exit 2, turn back and walk straight for about 200 m.
Step 2 Turn left into the alley immediately before GS25. (Photo of the shop)
Step 3 The property is the third building on the right, with a blue gate. (Photo of the gate)
Avoid vague phrases such as “a little further” or “that alley.” Use exit numbers, distances and visible shop names that newcomers can verify. Check whether construction or darkness changes how the route looks.
Take photos from the direction guests approach. Leave essential directions in text too, in case images do not load.
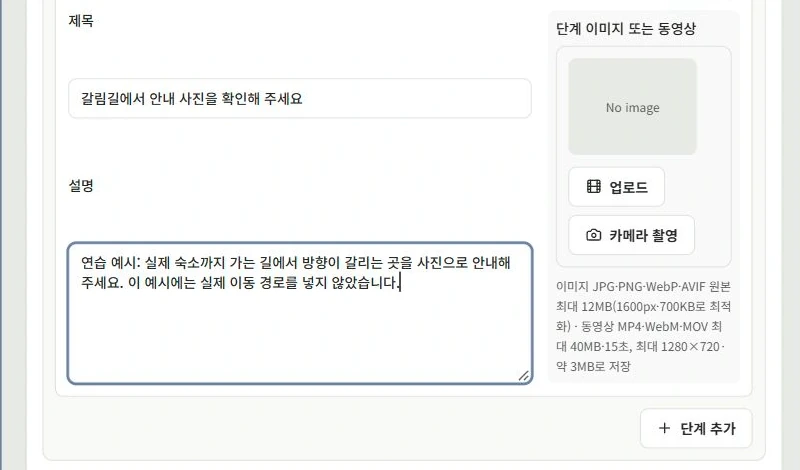
The screenshot’s first step says “Check the exit directions first.”
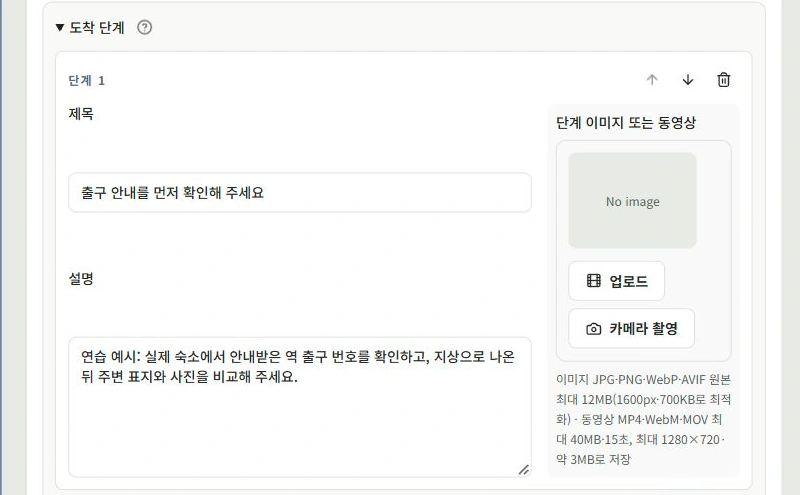
We selected Add step and added “Check the guidance photo at the junction” as the second step.
4. Choose who sees it and when
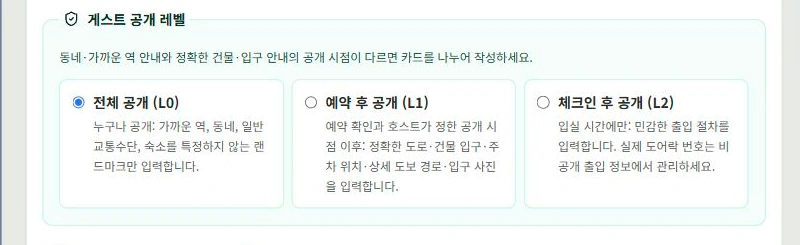
Choose the audience in the card’s disclosure settings.
| Disclosure level | Suitable information |
|---|---|
| Public | Neighbourhood information or nearby stations that anyone may see |
| After booking | Exact entrance, alley directions or parking location |
| After check-in | Procedures needed when entering |
Make sure directions become available early enough for guests arriving ahead of time. Available levels and timing options vary by plan.
Keep building-entry, door-lock and key-box codes out of card text and photos. Manage them in the dedicated access fields. The stayV Guide Code that opens protected guidance and the actual door code are different.
5. Save the card and check the list
Select Save card inside the card, then confirm it appears in the list. This button is separate from the editor’s bottom Save button.
Reopen the saved card and check the title, content and audience. Arrange several cards in travel order, such as “From the station” followed by “Finding the building entrance.”
When a route changes, edit and save the existing card. Check for older cards with similar titles that could confuse guests.

6. Follow the route as a guest
Open the top Preview and find the arrival card. Check that its title appears and its steps and photos follow naturally when opened.
For a published property, check the actual guest link too. Confirm that cards set to After booking require a code.
Finally, walk from the station with your phone. Wherever you wonder which way to go, add a sentence or photo.

Check your progress
- You made a card for a section where guests often get lost.
- You used signs newcomers can identify, such as exit numbers and shop names.
- You chose each card’s audience and kept door codes out of the content.
Availability and things to know
Arrival cards are available on all plans. Disclosure options and reservation-specific release times vary by plan. Episode 14, Separate public guidance from booked-guest information, explains disclosure in more detail.
Read next
Episode 5 · Add property photos and host information
Episode 7 · Create stay information: check-in, check-out and Wi-Fi