
How to use stayV Host · EP. 05
Using stayV HostAdd property photos and host information
At a glance
Choose the first photo guests see and introduce the person helping them during their stay. Includes a host introduction you can adapt.

Photos help guests recognise the property. Your host introduction tells them who can help during their stay. Let’s upload photos, arrange their order and add host information.
Open your property’s editor from Property management. Uploading and writing are demonstrated with the Seoul Ongi Hanok · Practice guide draft. The photo list and profile visibility settings come from the operating Seoul Ongi Hanok property.
At a glance
- The first public photo becomes the guest view’s cover photo.
- Check images for mail, entry codes and people’s faces before uploading.
- Introduce the person responsible for guidance and explain how to contact them.
- Put phone numbers and email addresses in contact settings rather than the introduction.
- Profile photos and contact details are visible according to their disclosure settings.
Learn more
1. Review the photos already uploaded
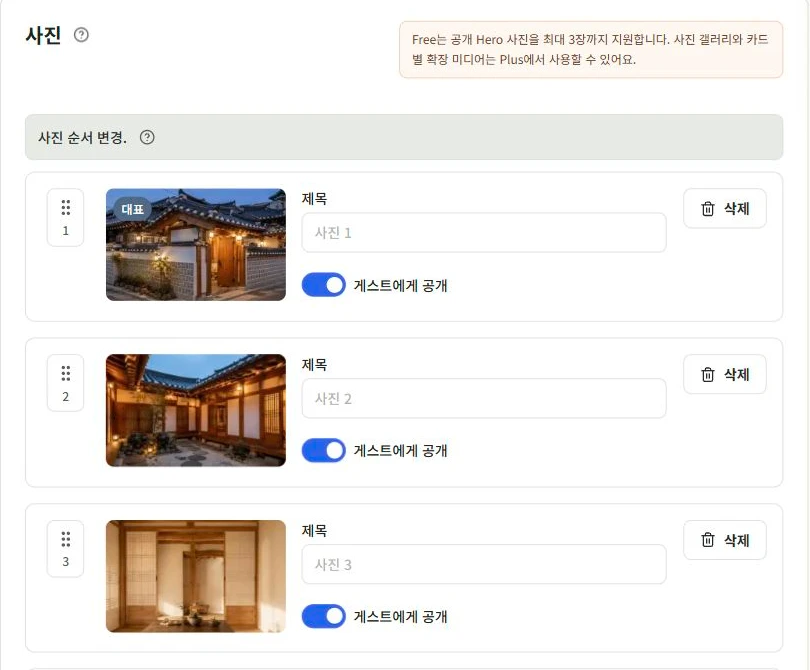
Select Photos on the left. If images are already there, check their order and visibility first. Reviewing old images helps avoid uploading the same scene twice.
For your first upload, choose a recognisable overview and major spaces such as the living room, bedroom and bathroom. Use your own property’s photos and avoid edits that misrepresent it. Guests may be disappointed if the property differs from its photos.
Check for mail, contact details, notes containing entry codes and people’s faces before uploading.
2. Upload and check the result
If there are no photos, select Upload photos and choose files. Wait until the new images appear. Choosing a file and immediately closing the window may interrupt an unfinished upload.
If an image does not appear or an error is shown, read the file-format and size guidance. Adjust the file as instructed rather than repeatedly choosing the same file.
Photo limits vary by plan. If you reach a limit, decide which images to keep.
3. Choose the cover photo and order
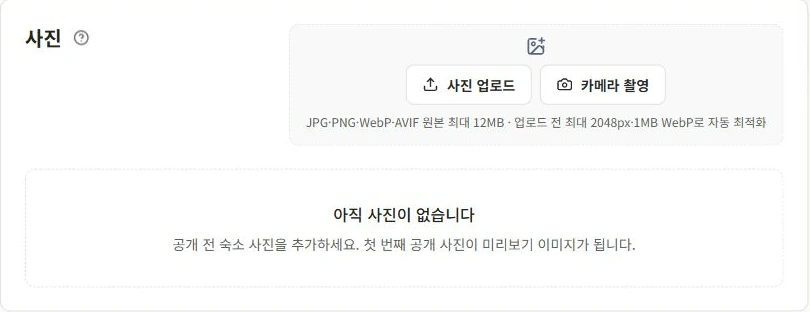
The first public photo becomes the guest view’s cover photo. Put a recognisable scene, such as the gate or exterior, first.
After rearranging, check that the first image is public. An unpublished image will not become the cover even if it is first in the list.
Where titles are available, use clear names such as “Living room,” “Second-floor bedroom” or “Bathroom.”
Check the saved state and photo list before moving on.
4. Add your name and introduction in Host
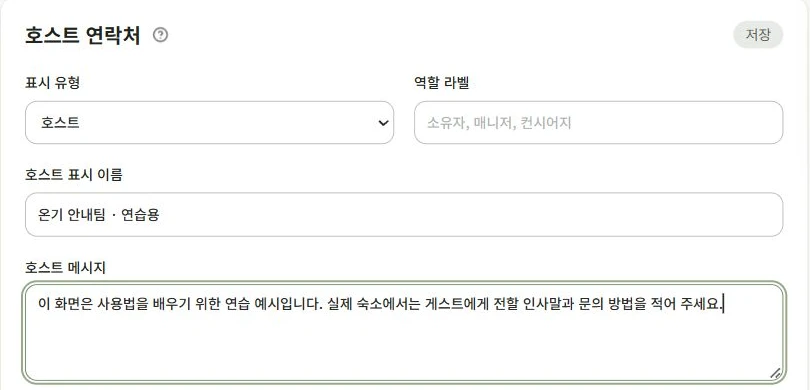
Open Host on the left. The screenshot uses Ongi Guide Team · Practice as the display name. Choose the name guests will see and write a short introduction. Explain whether the person helping them is the owner or a property manager.
Example host introduction
Hello, I’m Minji and I manage this property myself. This guide brings together the information you need during your stay. Please send questions through the platform where you booked; I reply between 9 a.m. and 10 p.m.
Only promise response times you can meet. A promise such as “I always reply immediately” can cause frustration if you cannot keep it.
5. Check profile-photo visibility
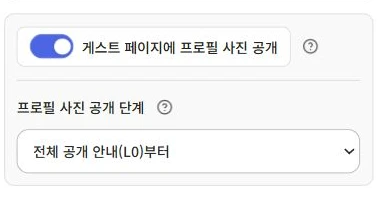
After uploading a profile photo, choose whether to display it and who can see it. Uploading does not make it equally visible to all visitors.
Check both visibility and disclosure level. Choose whether everyone opening the link can see it or only booked guests who enter a code.
Use a photo you have the right to use. A business-card image may unintentionally expose contact details.
6. Use the dedicated contact settings
Put phone numbers and email addresses in contact settings rather than your introduction. Read the guidance and enable only channels you can respond through.
Contact details are not shown to everyone opening the guide. Availability depends on the plan and reservation verification. Information saved in the host screen is not necessarily shown unchanged to guests.
For bookings through Airbnb or another platform, keeping that platform’s conversation as the main contact channel makes records easier to find. Add other channels when necessary.
7. Save and check the guest view
Select Save at the bottom and confirm it finished. In the top Preview, review the cover photo, photo order, host name and introduction.
For a published property, also check the actual guest link. If a photo or contact button looks different from expected, review disclosure settings and guest access conditions before re-entering the information.

Check your progress
- Your public cover photo makes the property recognisable.
- Photos contain no personal information or entry codes.
- Your introduction explains how to contact you and when you can reply.
Availability and things to know
Photos and host information are available on all plans. Photo limits and contact-detail visibility vary by plan.
Read next
Episode 4 · Set up your basic information and location
Episode 6 · Create arrival instructions and choose when guests see them